The Complete Guide to Cleaning Walking Boots: Expert Tips for Long-Lasting Performance
Why Walking Boot Maintenance Matters
 Quality walking boots represent a significant investment, often costing $150-$400 or more. However, the true value extends far beyond the initial purchase price. Proper maintenance transforms this investment into years of reliable performance, comfort, and protection on countless adventures.
During my thru-hike of the Continental Divide Trail, I witnessed firsthand how neglected boots fail their owners. Fellow hikers nursing blisters from degraded cushioning, dealing with wet feet from compromised waterproofing, or facing expensive replacements mid-journey. These scenarios are entirely preventable with consistent care.
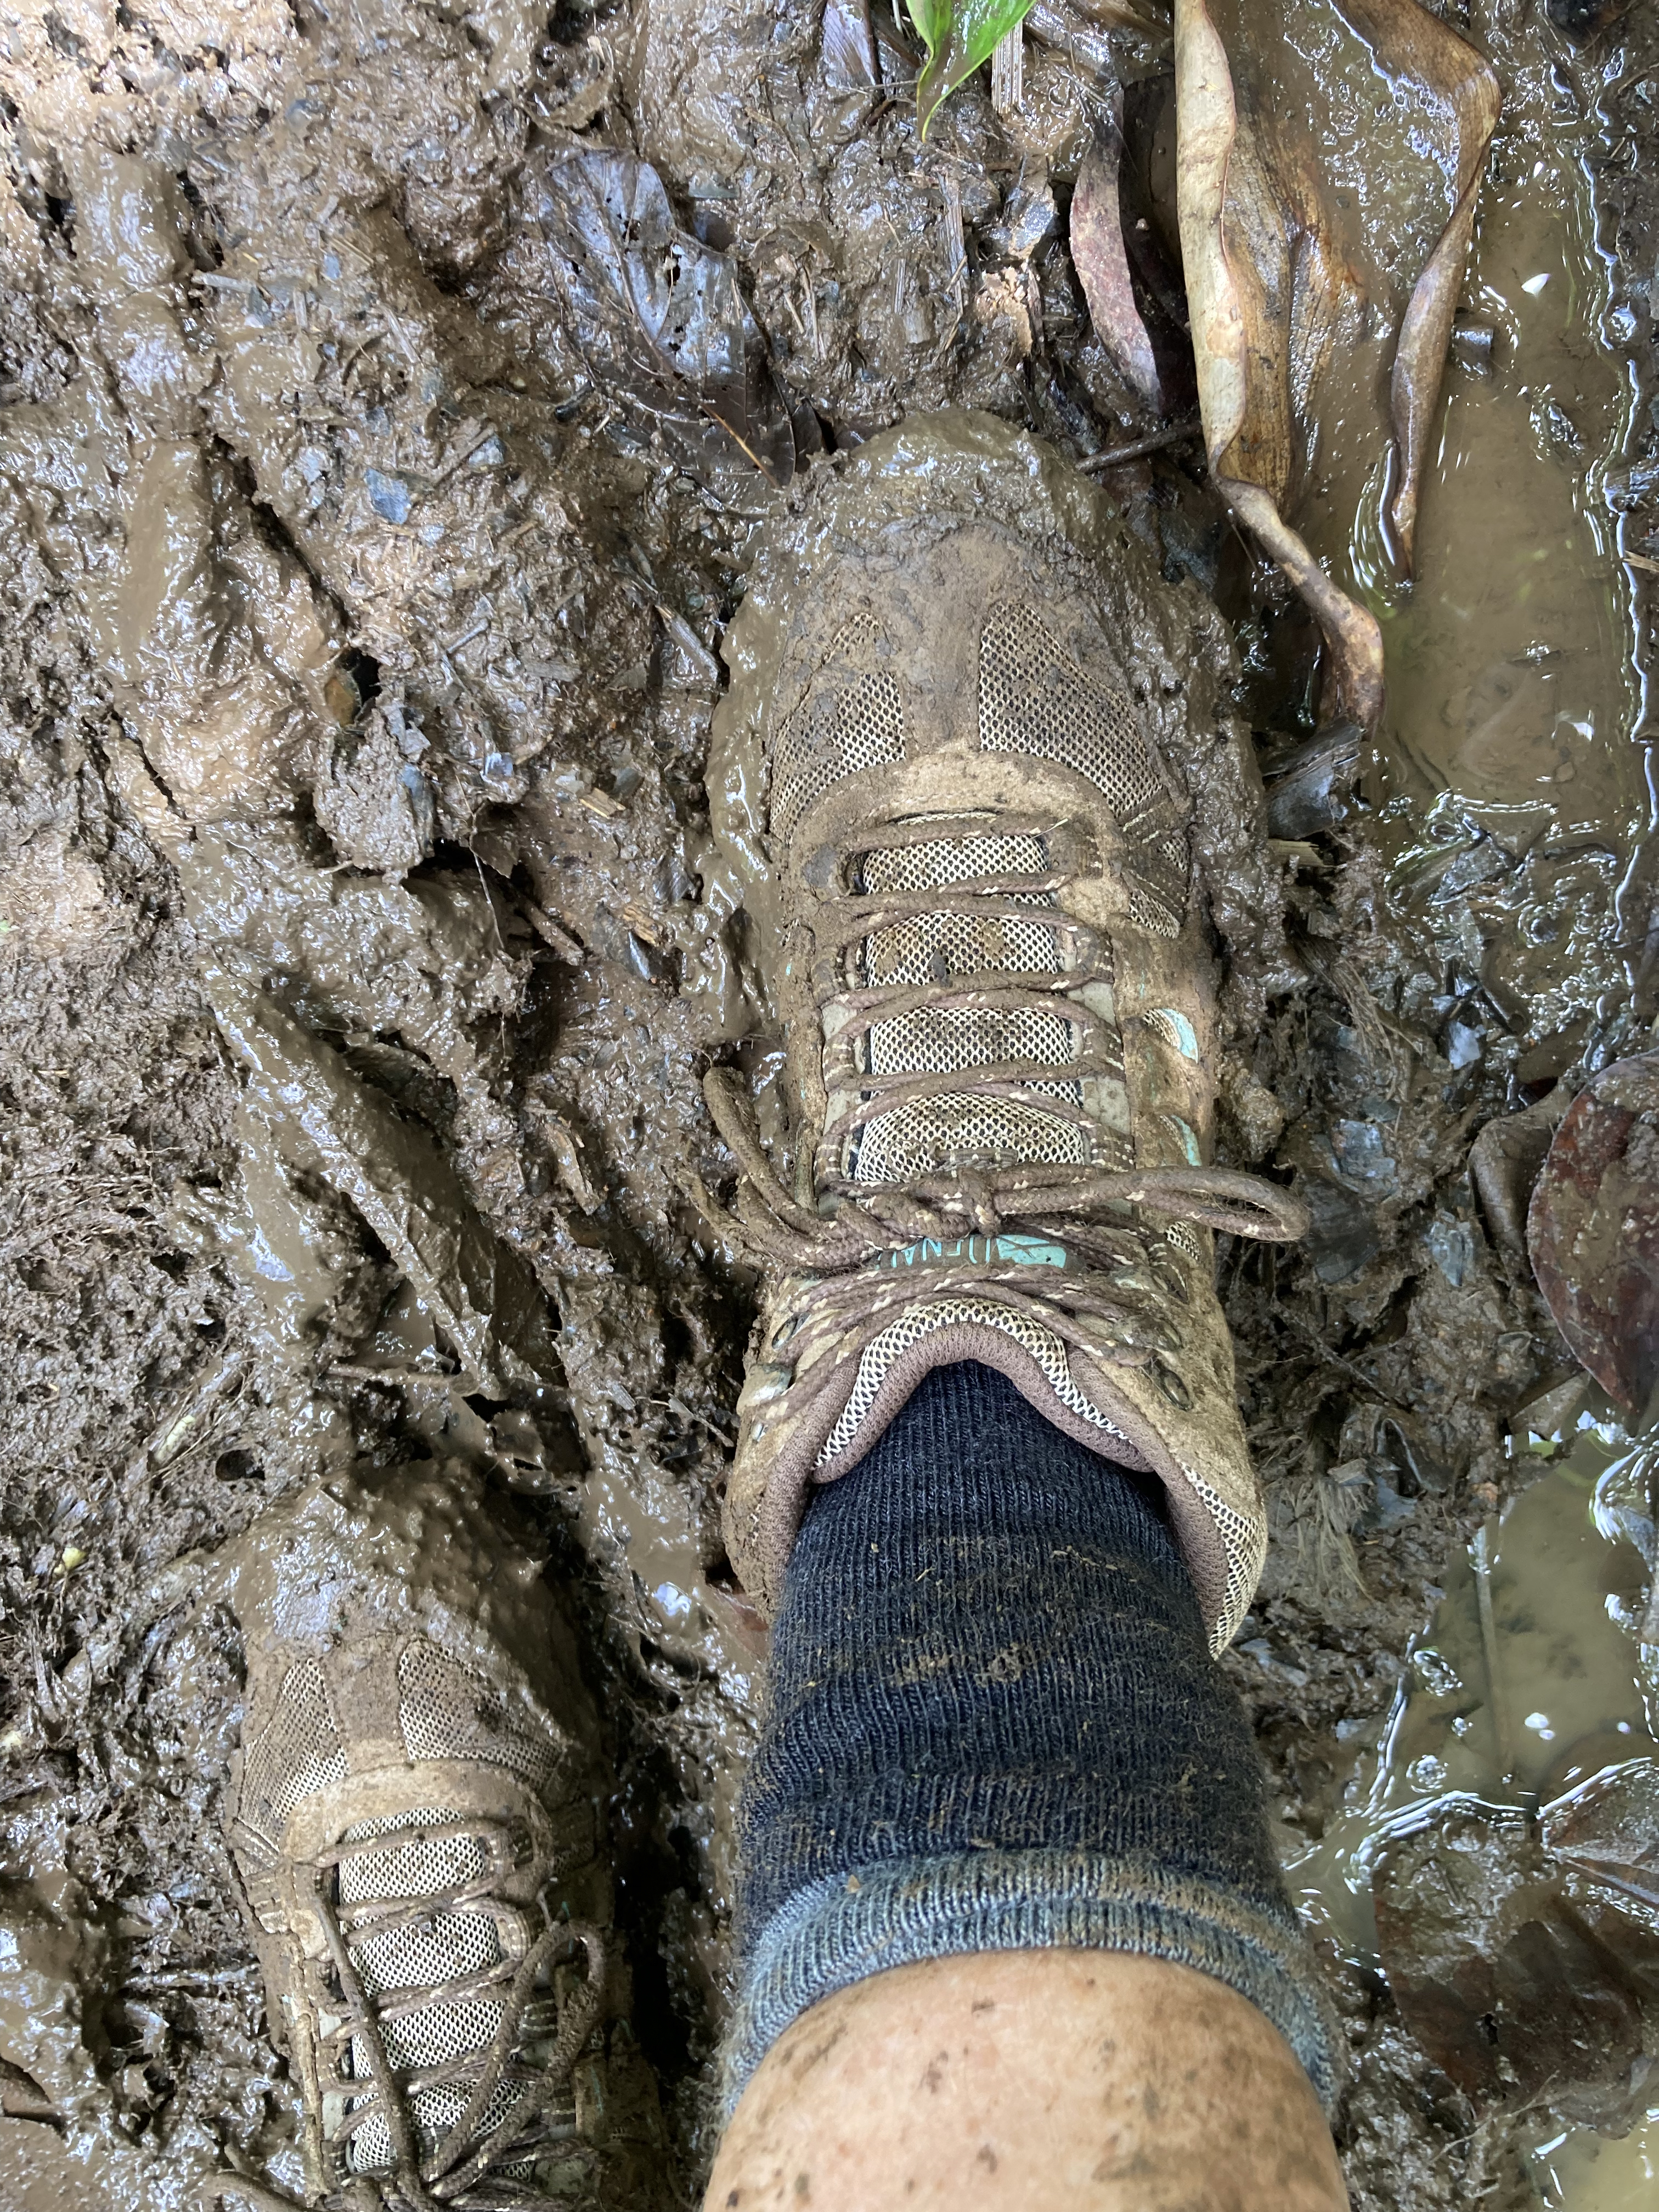
The science behind boot deterioration is straightforward yet often overlooked. Every step drives microscopic dirt particles deeper into leather and fabric fibers, creating an abrasive paste that gradually breaks down materials. Mud contains minerals that leach moisture from leather, causing cracking and brittleness. Salt from sweat accelerates this process, particularly around high-flex areas.
Regular cleaning walking boots removes these destructive elements before they cause permanent damage. Beyond preservation, clean boots perform better. Unobstructed pores in leather and synthetic materials maintain breathability, while clean treads provide optimal traction. I've learned that boots maintained properly often outlast their neglected counterparts by 3-4 years.
Consider the environmental impact as well. When I started taking serious hiking trips, I replaced boots every 18 months due to poor care. Now, with proper maintenance, my current pair has exceeded five years of heavy use. This reduction in consumption benefits both your wallet and the planet.
Professional guides and outdoor instructors universally emphasize boot care because they understand the consequences of failure. A boot malfunction miles from the nearest road isn't just inconvenient—it's potentially dangerous. During my years leading backcountry trips, emergency evacuations due to equipment failure were almost always preventable with proper maintenance.
The psychological benefits shouldn't be underestimated either. Clean, well-maintained gear boosts confidence and enhances the overall outdoor experience. There's something deeply satisfying about starting a hike with boots that look and perform like new, knowing they'll reliably carry you through whatever challenges the trail presents.
Quality walking boots represent a significant investment, often costing $150-$400 or more. However, the true value extends far beyond the initial purchase price. Proper maintenance transforms this investment into years of reliable performance, comfort, and protection on countless adventures.
During my thru-hike of the Continental Divide Trail, I witnessed firsthand how neglected boots fail their owners. Fellow hikers nursing blisters from degraded cushioning, dealing with wet feet from compromised waterproofing, or facing expensive replacements mid-journey. These scenarios are entirely preventable with consistent care.
The science behind boot deterioration is straightforward yet often overlooked. Every step drives microscopic dirt particles deeper into leather and fabric fibers, creating an abrasive paste that gradually breaks down materials. Mud contains minerals that leach moisture from leather, causing cracking and brittleness. Salt from sweat accelerates this process, particularly around high-flex areas.
Regular cleaning walking boots removes these destructive elements before they cause permanent damage. Beyond preservation, clean boots perform better. Unobstructed pores in leather and synthetic materials maintain breathability, while clean treads provide optimal traction. I've learned that boots maintained properly often outlast their neglected counterparts by 3-4 years.
Consider the environmental impact as well. When I started taking serious hiking trips, I replaced boots every 18 months due to poor care. Now, with proper maintenance, my current pair has exceeded five years of heavy use. This reduction in consumption benefits both your wallet and the planet.
Professional guides and outdoor instructors universally emphasize boot care because they understand the consequences of failure. A boot malfunction miles from the nearest road isn't just inconvenient—it's potentially dangerous. During my years leading backcountry trips, emergency evacuations due to equipment failure were almost always preventable with proper maintenance.
The psychological benefits shouldn't be underestimated either. Clean, well-maintained gear boosts confidence and enhances the overall outdoor experience. There's something deeply satisfying about starting a hike with boots that look and perform like new, knowing they'll reliably carry you through whatever challenges the trail presents.
Essential Cleaning Supplies and Tools
 Success in cleaning walking boots begins with having the right tools and products. After years of trial and error, I've refined my cleaning arsenal to include only the most effective items. Quality tools make the process faster, more thorough, and ultimately more successful.
Must-Have Brushes and Tools
The foundation of any boot cleaning kit is a proper brush selection. I recommend three different brushes: a stiff-bristled brush for removing dried mud and debris, a medium-bristled brush for general cleaning, and a soft brush for delicate materials and application of treatments. The BootBuddy Shoe & Boot Cleaner Brush has become my go-to tool for aggressive cleaning. Its unique design allows easy access to boot treads and crevices while providing excellent scrubbing power. The ergonomic handle reduces hand fatigue during extended cleaning sessions. For gentler work, particularly on nubuck or suede materials, I rely on the 4-Piece Horsehair Shine Brush Kit. These natural bristles effectively clean without damaging delicate surfaces. The kit includes different sizes for various applications, from overall cleaning to detail work around eyelets and seams. Beyond brushes, keep an old toothbrush for precision work, a plastic scraper or dull knife for removing caked mud, and microfiber cloths for wiping and buffing. A small bucket or basin makes the process cleaner and more organized.Professional-Grade Cleaning Products
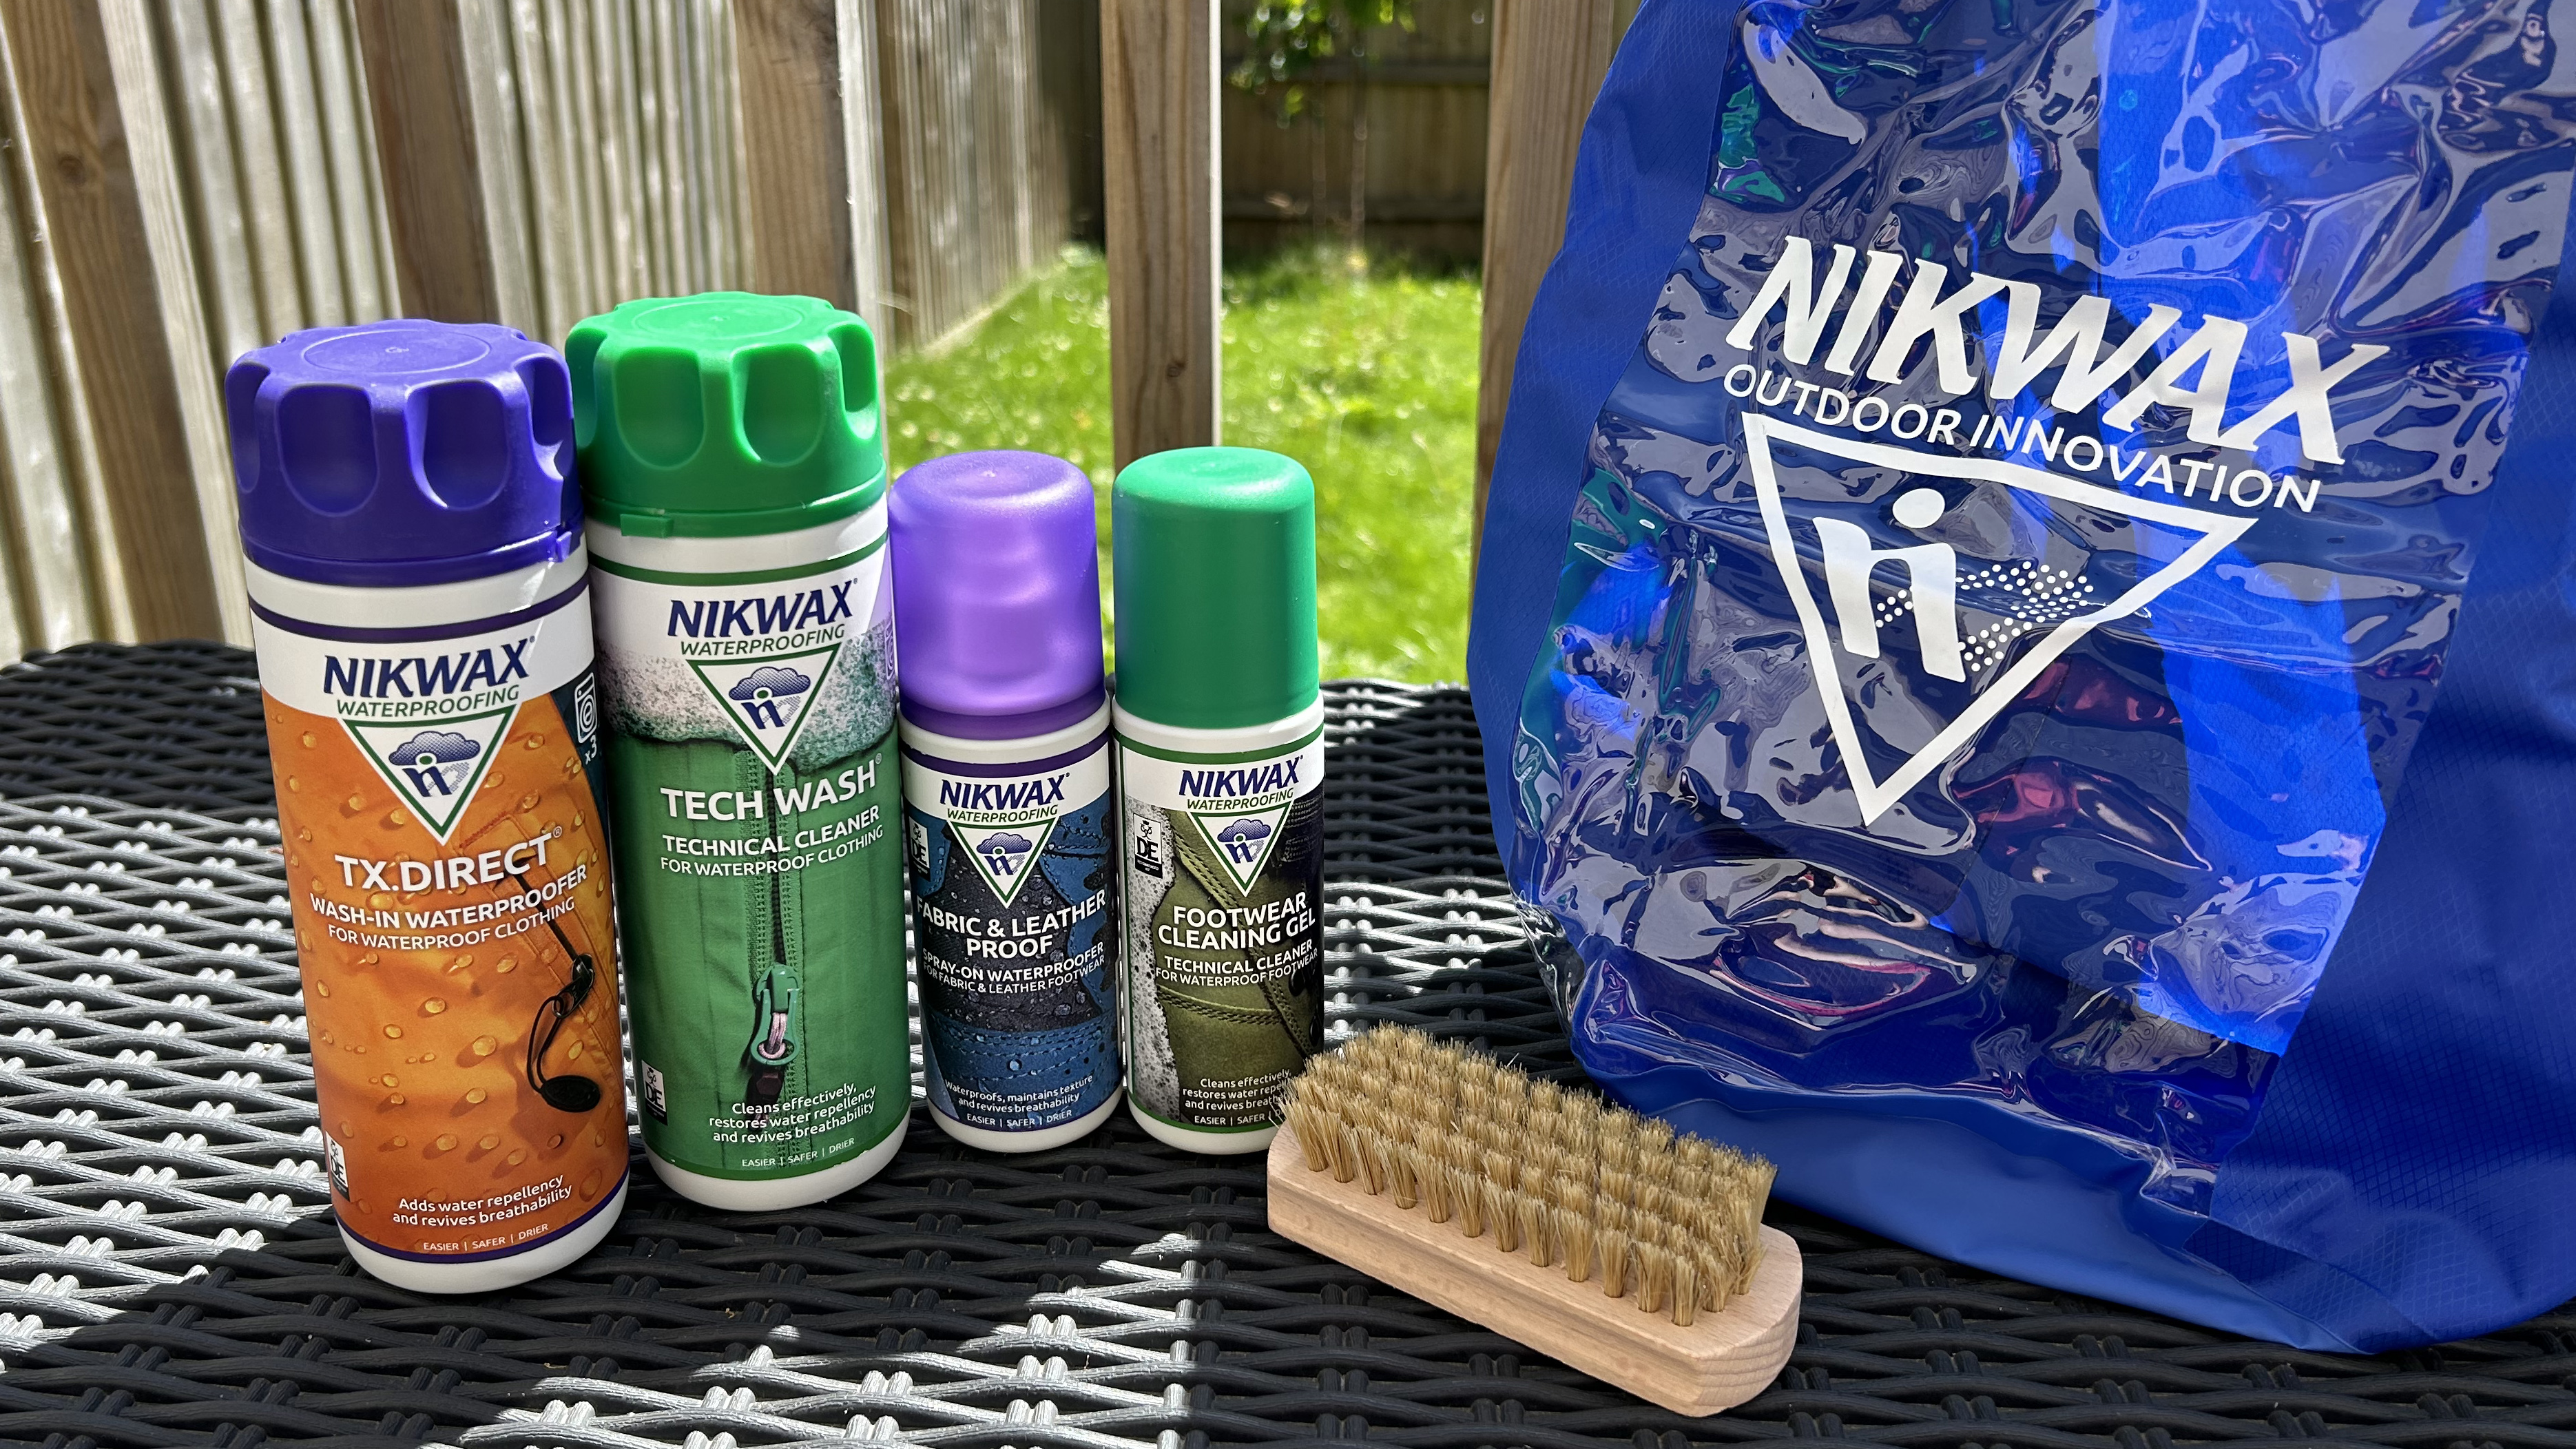
Product selection significantly impacts cleaning effectiveness and boot longevity. Avoid household cleaners, which can damage waterproof membranes and deteriorate leather. Instead, invest in specialized boot care products designed for outdoor footwear. The Nikwax Footwear Cleaning Gel stands out as my preferred cleaner for most situations. It works effectively on leather, fabric, and synthetic materials without compromising waterproof treatments. The gel consistency allows for controlled application and thorough cleaning without waste. For comprehensive care, consider the Revivex Suede Hiking Boot Cleaner Kit. This complete system includes cleaner, waterproofer, and applicator tools specifically formulated for technical footwear. It's particularly effective for mixed-material boots combining leather, fabric, and synthetic components. When dealing with stubborn odors or mold, create a solution of 80% water and 20% white vinegar. This natural mixture safely eliminates bacteria and fungus without damaging boot materials. Always test cleaning products on an inconspicuous area first to ensure compatibility.Waterproofing and Conditioning Arsenal
Maintaining water resistance and leather suppleness requires specific products matched to your boot materials. Leather boots need different treatment than synthetic materials, and using the wrong product can reduce performance. The Gear AID Revivex Leather Boot Conditioning Kit provides comprehensive care for full-grain leather boots. The conditioner maintains suppleness while the waterproofer restores water repellency. This combination extends leather life significantly, particularly in high-flex areas prone to cracking. For synthetic and fabric boots, spray-on treatments like those in the Nikwax system work better than cream-based products. They penetrate technical fabrics more effectively while maintaining breathability—crucial for Gore-Tex and similar membranes. Store all products in a cool, dry location and check expiration dates regularly. Expired treatments may not perform effectively and could potentially damage boot materials. Quality products represent an investment that pays dividends in extended boot life and improved performance.Step-by-Step Cleaning Process
 Proper cleaning walking boots requires systematic approach and patience. Over the years, I've developed a proven method that ensures thorough cleaning without damaging materials. This process works for all boot types, from lightweight hiking footwear to heavy-duty mountaineering boots.
Preparation and Initial Assessment
Begin by removing laces completely and pulling out insoles. This crucial step allows access to all boot surfaces and prevents damage to these components during cleaning. Shake boots vigorously to dislodge loose dirt and debris, then bang them together outside to remove larger particles. Inspect boots thoroughly before cleaning. Look for damage like loose stitching, worn areas, or separation between sole and upper. Identifying problems early allows for appropriate repairs and prevents water damage during cleaning. During my Colorado hiking adventures, I've caught several potential failures during routine cleaning. Assess the cleaning challenge level. Light dust requires minimal effort, while caked mud demands aggressive treatment. Boots with mixed materials need careful product selection to avoid damaging any component. Understanding what you're dealing with prevents over-cleaning delicate materials or under-cleaning heavily soiled areas. Set up your workspace with good ventilation, adequate lighting, and easy access to water. Lay out tools and products beforehand to maintain workflow efficiency. Working outdoors when possible prevents mess and allows for thorough rinsing.Deep Cleaning Technique
Start with dry brushing using your stiffest brush. Work systematically from top to bottom, paying special attention to seams, eyelets, and the junction between upper and sole. This removes loose dirt before water turns it into abrasive paste. Use circular motions and apply moderate pressure—enough to dislodge debris without damaging materials. For treads, use a plastic scraper or old knife to remove packed debris. Rocks, roots, and hardened mud can be surprisingly stubborn. Take time with this step, as clean treads are essential for traction safety. I learned this lesson during a sketchy descent in Olympic National Park when neglected treads cost me several embarrassing slips. Apply cleaning solution according to product instructions. Most work better on damp boots, so light misting with clean water enhances effectiveness. Work cleaner into materials using circular scrubbing motions, starting gently and increasing pressure as needed. Focus on heavily soiled areas but don't neglect apparently clean sections—they likely contain invisible dirt that affects performance. Pay special attention to high-wear areas like toe caps, heel counters, and flex points around the ankle. These areas accumulate more dirt and suffer greater stress, requiring thorough cleaning to prevent premature failure. The ankle flex zone particularly benefits from detailed attention, as dirt here directly impacts comfort and support.Interior Cleaning and Sanitization
Interior cleaning often gets overlooked but significantly impacts comfort and hygiene. Remove any debris that's accumulated inside, then wipe down with a damp cloth. For boots with removable liners, take them out for separate cleaning. Address odors with a vinegar solution (20% vinegar, 80% water) applied with a cloth or spray bottle. This natural antibacterial treatment eliminates odor-causing bacteria without damaging materials. After application, wipe clean with a damp cloth and allow thorough drying. For persistent odor problems, stuff boots overnight with activated charcoal sachets or baking soda in old socks. These natural odor absorbers work effectively without leaving residue. Remove before proceeding with waterproofing treatments. Clean insoles separately using warm soapy water and a soft brush. Most modern insoles are antimicrobial treated, but cleaning removes accumulated sweat salts that can cause irritation. Allow complete air drying before reinstalling—wet insoles promote bacterial growth and compromise comfort.Final Rinse and Inspection
Thorough rinsing removes all cleaning product residue, which can interfere with subsequent treatments. Use clean, lukewarm water and rinse until runoff is completely clear. Pay particular attention to seams and crevices where cleaning products can accumulate. After rinsing, inspect boots again for missed spots or revealed damage. Sometimes cleaning exposes problems that weren't visible under dirt layers. Address any issues before proceeding to drying and treatment phases. Shake out excess water but avoid aggressive handling that could stress wet materials. Wet leather and fabric are more vulnerable to damage than when dry. The goal is removing standing water while preserving boot structure and preventing over-flexing of saturated materials.Waterproofing and Conditioning Techniques
Proper waterproofing and conditioning represent the difference between boots that perform for years versus those that fail prematurely. These treatments are not afterthoughts but essential maintenance steps that preserve boot integrity and performance. My approach has evolved through years of field testing in conditions ranging from Pacific Northwest rainforests to desert canyons.Understanding DWR and Waterproof Treatments
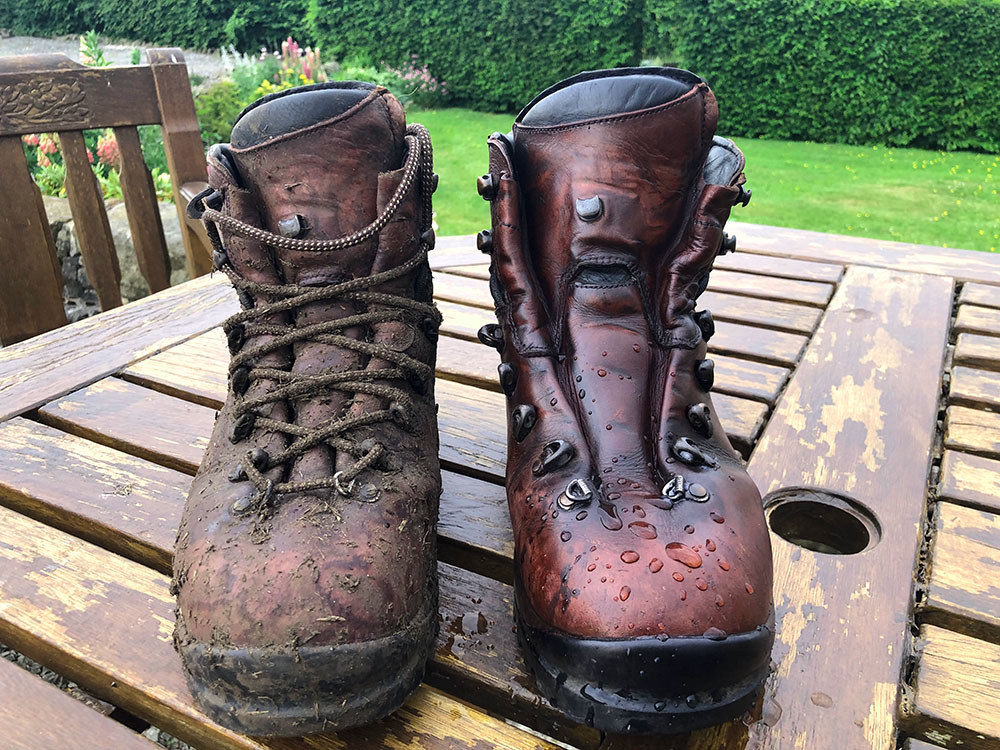
Durable Water Repellent (DWR) treatments create a molecular barrier that causes water to bead and roll off surfaces rather than soaking in. This coating is applied during manufacturing but wears away with use, dirt accumulation, and time. Recognizing when DWR needs refreshing is crucial for maintaining boot performance. Test water repellency by sprinkling clean water on boot surfaces. Fresh DWR causes immediate beading and runoff. Compromised treatments allow water absorption, visible as dark spots where water soaks in. This simple test should be performed monthly during regular use periods. Different boot materials require specific treatment approaches. Full-grain leather responds best to wax-based treatments that penetrate deeply and provide long-lasting protection. Synthetic materials need spray-on treatments that don't interfere with membrane breathability. Mixed-material boots require careful product selection to address each component appropriately. During my section hike of the Pacific Crest Trail, I tested various waterproofing methods extensively. Boots treated with appropriate products maintained water resistance throughout the challenging Sierra Nevada snowpack crossing, while inadequately treated boots led to cold, wet feet and potential safety concerns.Application Timing and Technique
Timing waterproofing application correctly maximizes treatment effectiveness. Apply treatments to damp, clean boots for optimal penetration. Completely dry boots don't absorb treatments as effectively, while soaking wet boots dilute products and reduce effectiveness. Work in thin, even coats rather than heavy applications. Excess product can clog pores, reducing breathability and attracting dirt. Multiple light coats provide better coverage and longer-lasting protection than single heavy applications. Allow each coat to dry completely before applying subsequent treatments. Pay special attention to stress points and seams where water intrusion is most likely. These areas receive the most wear and benefit from extra treatment attention. Use a small brush or applicator to work treatment into seam areas that spray applications might miss. Environmental conditions affect application success. Avoid treating boots in direct sunlight or extreme temperatures. Cool, dry conditions with low humidity provide optimal treatment absorption and curing. I prefer treating boots in the evening, allowing overnight curing before next-day use.Leather Conditioning Best Practices
Leather conditioning maintains flexibility and prevents cracking that leads to premature failure. However, over-conditioning can make leather too soft, reducing support and structure. Finding the right balance requires understanding your specific leather type and usage patterns. Full-grain leather hiking boots benefit from conditioning every 3-4 months with regular use. Nubuck and suede require different approaches—standard conditioners can damage their texture and appearance. Always verify product compatibility before application. Focus conditioning efforts on high-flex areas like ankle joints, toe boxes, and heel counters. These zones experience the most stress and benefit most from maintained suppleness. During my experience with various quality leather boots, I've learned that consistent conditioning of these critical areas prevents costly repairs. Apply conditioner in thin layers using circular motions to ensure even penetration. Work product into leather surfaces systematically, paying attention to areas that may have been missed. Allow complete absorption before buffing away excess with a clean cloth. Quality conditioners also provide some water resistance, though dedicated waterproofing treatments offer superior protection. The combination of proper conditioning followed by appropriate waterproofing provides optimal leather boot care and maximum longevity.Synthetic and Technical Fabric Care
Modern hiking boots increasingly incorporate synthetic materials and technical fabrics that require specialized care approaches. These materials offer advantages in weight and performance but demand different maintenance techniques than traditional leather. Gore-Tex and similar breathable membranes are particularly sensitive to treatment products. Use only treatments specifically designed for breathable waterproof fabrics. Standard leather treatments can clog membrane pores, destroying breathability and causing internal condensation problems. Synthetic materials generally require less conditioning than leather but still benefit from appropriate treatments. Focus on maintaining water repellency while preserving fabric flexibility. Spray-on treatments usually work better than cream-based products for synthetic materials. Regular cleaning becomes even more critical with technical fabrics, as dirt accumulation interferes with their engineered properties. The microscopic structure that provides breathability and water resistance can be compromised by contamination that would merely be cosmetic on leather boots.My Personal Experience and Lessons Learned
After 15 years of serious hiking and countless mistakes, I've learned that boot maintenance is as crucial as navigation skills. Here are the hard-earned lessons that transformed my approach to gear care.
Early Mistakes and Expensive Lessons
My first major error was assuming that "waterproof" meant maintenance-free. I believed manufacturers' claims about permanent waterproofing and never bothered with treatments. After several months of regular use, water began penetrating, leading to uncomfortable hikes and eventually, completely compromised waterproofing. The washing machine incident remains one of my most expensive learning experiences. Thinking I could save time, I threw muddy boots into the washing machine after a particularly messy hike in Olympic National Park. The agitation loosened sole adhesive, creating a separation that couldn't be repaired. A $300 pair of boots became unusable in a single wash cycle. Neglecting interior cleaning created another set of problems. Accumulated sweat salts and bacteria created odors so persistent that even professional cleaning couldn't eliminate them. More importantly, the chemical environment inside neglected boots degraded materials and caused premature wear of comfort features. Over-conditioning leather taught me about balance in boot care. Enthusiastic about maintaining my new boots, I applied conditioner monthly, thinking more was better. The leather became too soft, reducing ankle support and causing the boots to break down structurally. Finding the right maintenance frequency requires understanding your specific usage patterns.Regional Challenges and Adaptations
Different environments present unique boot maintenance challenges that require adapted approaches. Desert hiking in places like Arizona's national parks demands attention to fine sand infiltration, which acts like sandpaper on boot materials. Frequent cleaning becomes essential to prevent accelerated wear. Pacific Northwest conditions taught me about mold and mildew prevention. High humidity and frequent moisture exposure create perfect conditions for fungal growth. Learning to thoroughly dry boots and use preventive treatments became essential for equipment longevity in this environment. High-altitude hiking presents its own challenges, particularly freeze-thaw cycles that stress waterproofing and accelerate material degradation. Boots need more frequent treatment in these conditions, and flexibility becomes crucial as materials become brittle in extreme cold. Coastal hiking introduced salt contamination issues. Ocean spray and salt air accelerate corrosion of metal components and degrade leather and fabric materials. Post-hike rinsing with fresh water became a necessary routine to prevent long-term damage.Professional Guidance and Mentorship
Working with professional guides transformed my understanding of equipment care. These individuals depend on their gear for their livelihood and have refined maintenance practices to an art form. Observing their techniques and understanding their reasoning provided insights that years of independent experience might not have revealed. A particularly influential mentor was a wilderness therapy guide who had maintained the same pair of boots for over 8 years of professional use. His systematic approach to cleaning, conditioning, and storage demonstrated how proper care extends equipment life far beyond typical expectations. His boots performed better after 8 years than my neglected boots performed after 8 months. Local cobbler relationships proved invaluable for learning proper boot construction and maintenance principles. These craftspeople understand how boots are built and how different materials respond to treatments. Their advice on when to repair versus replace saved money and extended the useful life of several pairs of boots. Outdoor retailer staff, particularly those with extensive field experience, provided practical guidance on product selection and application techniques. Their recommendations, based on real-world feedback from numerous customers, helped avoid products that sounded good in theory but failed in practice.Seasonal Maintenance Strategies
Developing seasonal maintenance routines maximized boot performance while minimizing maintenance time. Spring preparation involves thorough cleaning after winter storage, waterproofing renewal, and inspection for winter damage. This seasonal refresh ensures boots are ready for increased hiking activity. Summer maintenance focuses on frequent cleaning due to higher usage and dust accumulation. Weekly inspections during peak usage periods catch problems early, while monthly deep cleaning maintains performance. Proper summer care prevents accumulated damage that becomes expensive to repair. Fall preparation emphasizes waterproofing renewal before wet weather arrives and condition assessment for winter storage. This is when I make decisions about repairs, replacements, or major reconditioning. Planning purchases during fall sales ensures quality boots are available when needed. Winter storage requires careful preparation to prevent deterioration during dormant periods. Clean, dry boots stored with cedar shoe trees in breathable bags emerge ready for spring use. Poor storage practices can undo months of careful maintenance, making this step crucial for long-term boot health.Troubleshooting Common Problems
Even with proper maintenance, walking boots occasionally develop problems that require specific solutions. Understanding how to address these issues can save expensive professional repairs or premature replacement. My troubleshooting expertise comes from encountering virtually every boot problem imaginable during years of intensive hiking.Persistent Odor Issues
Severe boot odors often resist standard cleaning approaches and require aggressive treatment. The problem usually stems from bacterial or fungal growth deep within boot materials, particularly in areas that don't dry completely between uses. Standard solutions like odor sprays only mask the problem temporarily. Begin with a thorough vinegar treatment using a 20% vinegar, 80% water solution. Remove laces and insoles, then spray or wipe all interior surfaces. Allow boots to sit for 30 minutes before wiping clean with damp cloth. This treatment kills bacteria and neutralizes odor-causing compounds without damaging boot materials. For stubborn cases, create an overnight treatment using activated charcoal or baking soda. Fill old socks with either material and stuff them into boots overnight. These natural absorbers continue working long after application, drawing out deep-seated odors. Remove and vacuum out any residue before next use. Persistent problems may require professional ozone treatment or enzyme cleaners designed for outdoor gear. Some outdoor retailers offer this service, or you can rent ozone generators for home treatment. Always ensure boots are completely dry before treatment to maximize effectiveness. UV sterilization provides another powerful tool against odor-causing microorganisms. Place clean, dry boots in direct sunlight for several hours, rotating to expose all surfaces. UV light kills bacteria and fungi while naturally deodorizing materials. This method works particularly well for synthetic materials.Waterproofing Failures
When properly applied waterproofing fails prematurely, the problem usually lies in preparation or product selection rather than application technique. Contaminated surfaces prevent proper treatment bonding, while incompatible products can actually reduce water resistance. Strip existing treatments before reapplication if waterproofing fails within normal timeframes. Use a specialized cleaner designed to remove old treatments, or create a mild degreasing solution with dish soap. Thoroughly clean and rinse before applying fresh treatment to ensure proper bonding. Seam failures represent a specific waterproofing challenge requiring targeted solutions. These critical junction points experience high stress and often fail first. Use seam sealers specifically designed for boot construction, applying thin coats to both interior and exterior seam areas. Consider professional evaluation if waterproofing continues to fail despite proper treatment. Sometimes the problem stems from manufacturing defects, membrane damage, or material degradation that home treatment cannot address. Early identification of these issues may qualify for warranty coverage.Structural Integrity Concerns
Sole separation represents one of the most serious boot problems but often develops gradually, allowing for early intervention. Monitor the junction between sole and upper for any gaps or looseness, particularly at stress points like the toe and heel areas. Minor separations can sometimes be addressed with flexible shoe repair adhesives, but success depends on the separation extent and boot construction method. Clean separation areas thoroughly, apply adhesive according to instructions, and clamp until cured. This repair can extend boot life significantly if performed before separation becomes extensive. Worn or damaged hardware like eyelets, hooks, or buckles can often be replaced by qualified repair shops. Document all hardware specifications before seeking repairs to ensure correct replacement parts. Many manufacturers provide replacement hardware for their boots at reasonable cost. Upper material damage like tears or punctures requires immediate attention to prevent water intrusion and further damage. Small punctures can be sealed with specialized fabric repair tape or flexible adhesives. Larger damage may require professional patching or stitching repair.Prevention Through User Reviews and Experience
Learning from other users' experiences helps prevent common problems before they occur. I regularly review feedback from fellow hikers, particularly those using similar boots in comparable conditions. Online communities provide valuable insights into long-term performance and maintenance requirements. Three user reviews consistently highlight the importance of proper break-in and maintenance: **Amazon Review Summary**: "Initially skeptical about spending time on boot maintenance, but following proper cleaning protocols extended my boot life from 18 months to over 4 years. The key was consistent care rather than intensive treatments." **Reddit r/hiking Community**: "Learned the hard way that different environments require adjusted maintenance schedules. Desert hiking demands more frequent cleaning, while wet environments need enhanced drying protocols. One size doesn't fit all." **Quora Outdoor Gear Discussion**: "Professional guide shared that boot maintenance time pays for itself in reduced replacement costs and improved performance. His technique of monthly deep cleaning and seasonal treatments kept boots performing like new for years." These experiences reinforce that consistency in maintenance produces better results than sporadic intensive treatments. Understanding your specific usage patterns and environmental challenges allows for customized care approaches that maximize boot longevity and performance.Frequently Asked Questions
How often should I clean my walking boots?
Clean your walking boots after every muddy hike and perform deep cleaning monthly with regular use. I learned this lesson the hard way after neglecting my boots for months during my Pacific Coast Trail section hike. The accumulated dirt acted like sandpaper, wearing down the leather prematurely. For casual weekend hikers, cleaning after 3-4 uses is sufficient, but always remove mud and debris immediately after each outing.
Can I put walking boots in the washing machine?
Never put walking boots in a washing machine. The agitation and heat can damage adhesives, deform the boot structure, and compromise waterproof membranes. During my early hiking days, I ruined a pair of expensive boots this way. The sole began separating after just one wash cycle. Instead, hand wash with lukewarm water and appropriate cleaners. Your boots will thank you with years of reliable service.
What's the best way to dry wet walking boots?
Remove laces and insoles, then stuff boots with newspaper in a well-ventilated area away from direct heat. Change newspaper every 2-3 hours initially. After crossing numerous streams in the Cascades, this method saved my boots from mold and maintained their shape. Avoid radiators, campfires, or hair dryers, as excessive heat damages leather and weakens adhesives. Patience pays off - proper air drying preserves boot integrity.
How do I know when my boots need waterproofing treatment?
Test water repellency by sprinkling drops on clean boot surfaces. If water soaks in instead of beading up and rolling off, it's time for treatment. During my Appalachian Trail thru-hike, I tested this monthly. Fresh treatments show obvious water beading, while worn coatings absorb moisture. Also watch for leather appearing dry or cracked - these are clear indicators your boots need conditioning and waterproofing attention.
What cleaning products should I avoid on walking boots?
Avoid harsh detergents, bleach, bar soap, and petroleum-based products like mink oil on modern hiking boots. These can damage waterproof membranes and over-soften leather, reducing support. I once used regular laundry detergent and noticed immediate deterioration in my boot's breathability. Stick to specialized boot cleaners like Nikwax or Grangers, or use very mild dish soap. For stubborn odors, a 20% vinegar solution works safely without damaging materials.
Conclusion
Mastering the art of cleaning walking boots transforms your relationship with outdoor gear from reactive replacement to proactive preservation. The techniques and strategies outlined in this guide represent years of field-tested experience, costly mistakes, and professional guidance distilled into actionable knowledge. The investment in proper boot maintenance pays dividends far beyond financial savings. Well-maintained boots provide consistent performance, enhanced safety, and the confidence that comes from reliable gear. During my countless adventures from challenging mountain terrain to casual nature walks, properly maintained boots have never let me down. Remember that cleaning walking boots is not just about appearance—it's about preserving the complex engineering that makes modern outdoor footwear possible. Every component, from waterproof membranes to specialized adhesives, performs better when properly maintained. This care extends boot life, maintains comfort, and ensures safety when you need it most. The seasonal approach to maintenance, combined with post-hike care routines, creates a sustainable system that becomes second nature over time. Start with the basics: remove debris immediately, clean thoroughly after dirty adventures, and treat materials appropriately for their specific requirements. As you develop your own maintenance routines, remember that consistency trumps intensity. Regular, gentle care produces better results than sporadic deep treatments. Your boots will reward this attention with years of faithful service, carrying you safely through whatever adventures await on the trail ahead.Take Action Today
Don't wait until your boots show signs of damage. Start implementing these maintenance techniques now to extend their life and improve your outdoor experiences.
Get Quality Boot Cleaner Shop Cleaning Tools