Out and Back Trail Guide: Complete Beginner's Guide to Your First Hiking Adventure
What Is an Out and Back Trail?
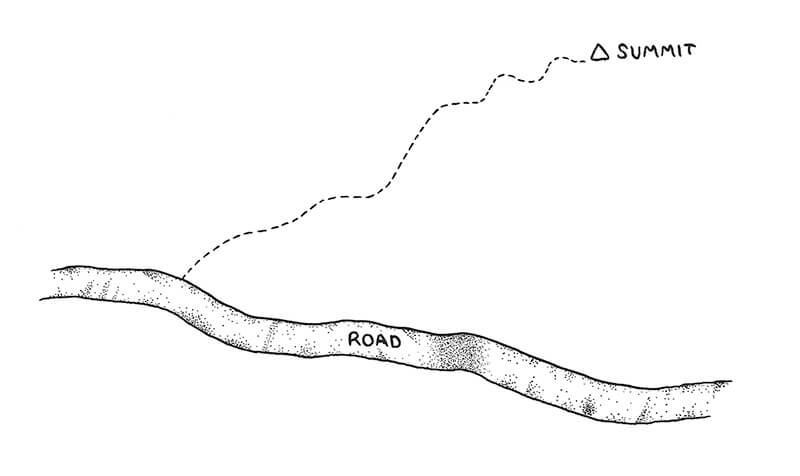
An out and back trail is exactly what it sounds like - a hiking route where you travel from a starting point to a specific destination, then return to your starting point using the exact same path. Think of it as hiking from Point A to Point B, then back to Point A along the identical trail. This simple concept makes out and back trails one of the most straightforward and beginner-friendly hiking experiences available.
During my first hiking experience on the Manitou Incline, I immediately understood why rangers recommend out and back trails for newcomers. The familiarity of retracing your steps provides a sense of security that's invaluable when you're still learning to read terrain and manage your energy levels on the trail.
The destination of an out and back trail typically offers a specific reward - a scenic overlook, waterfall, lake, summit, or historical site. Unlike loop trails that focus on the journey itself, out and back trails are destination-focused, giving you a clear goal to work toward. This structure helps beginners stay motivated and provides natural rest stops and photo opportunities.
Most out and back trail routes range from short 1-2 mile roundtrip walks to challenging 20+ mile adventures. The beauty lies in their scalability - you can choose a distance that matches your current fitness level and hiking experience. Popular hiking apps like AllTrails categorize these trails clearly, making it easy to find suitable options in your area.
One key advantage I've discovered through years of hiking is that out and back trails allow you to experience the same landscape from different perspectives. The lighting, shadows, and even your physical perspective change as you return, often revealing details you missed on the outbound journey. This dual perspective adds unexpected depth to what might initially seem like a repetitive experience.
Understanding Distance and Measurement
Understanding how out and back trail distances are calculated is crucial for planning your hike safely and realistically. This seemingly simple concept often confuses beginners, leading to unexpected challenges on the trail.
How Trail Distances Are Listed
Most hiking resources, including AllTrails, National Park Service websites, and guidebooks, list out and back trail distances as the total roundtrip distance. If you see an "8-mile out and back trail," you'll hike 4 miles to the destination and 4 miles back. However, this isn't universal, and I've encountered several exceptions that caught me off guard.
Trail markers on the actual trail typically show one-way distances to the destination. So if you start hiking and see a sign reading "Waterfall - 3 miles," your total hike will be 6 miles roundtrip. I learned this lesson the hard way during my early hiking days when I planned for a 3-mile hike but ended up completing 6 miles without adequate water supplies.
Elevation Considerations
Distance alone doesn't tell the whole story. Elevation gain significantly impacts difficulty and time requirements. A 3-mile out and back trail with 1,500 feet of elevation gain will be much more challenging than a flat 5-mile trail. When planning, I always check both total distance and elevation profile to get a complete picture.
Remember that what goes up must come down - but the return journey presents different challenges. Descending steep terrain can be harder on your knees and requires more concentration to avoid slips and falls. I always factor in extra time for careful descents, especially when the trail is rocky or loose.
Regional variations in distance reporting exist. Some state park systems list one-way distances, while others show roundtrip totals. When in doubt, I always stop at the visitor center to clarify with rangers. They're invaluable resources for understanding local trail conditions and current hazards. Investing in quality gear like proper hiking footwear becomes even more important when you're navigating varying terrain conditions.
Benefits and Potential Drawbacks
Key Benefits
- Easy Navigation: Following the same path both ways reduces the chance of getting lost and helps build confidence in trail reading skills.
- Familiar Landmarks: You'll recognize key features on the return trip, providing reassurance and helping with pacing.
- Flexibility to Turn Back: If weather changes, energy runs low, or equipment fails, you can easily reverse course at any point.
- Clear Destination: Most out and back trails lead to specific rewards like waterfalls, viewpoints, or historic sites.
Potential Drawbacks
- Repetitive Scenery: Some hikers find retracing the same path less engaging than continuously new views.
- Trail Congestion: Popular trails can become crowded, especially near trailheads and destinations.
- Time Management: The return journey often takes longer than expected due to fatigue and challenging descents.
- Energy Depletion: You'll need sufficient energy reserves for the return journey when you're already tired.
User Experience Summary
"Started with out and back trails as a beginner and they gave me the confidence to tackle more challenging hikes. The familiar return path helped me learn pacing and energy management." - Sarah M., REI member review
"Out and back trails are perfect for families. Kids get excited about reaching the destination, and parents feel secure knowing the route back." - Mike T., AllTrails community
"While I prefer loop trails now, out and back routes still offer unique advantages for photography - different lighting conditions on the return create amazing shot opportunities." - Jennifer L., outdoor photography enthusiast
Out and Back vs Loop Trails
Understanding the differences between out and back trail routes and loop trails helps you choose the right hiking experience for your goals, fitness level, and preferences. Both have their place in a hiker's repertoire, and I've learned to appreciate the unique benefits each offers.
Trail Structure Comparison
Out and Back Trails
Start at Point A, hike to Point B (destination), then return to Point A via the same path. The route is linear, with the midpoint typically being the main attraction or viewpoint.
Loop Trails
Start and end at the same location but follow a circular route without retracing steps. You experience continuously changing scenery throughout the entire hike.
When to Choose Each Type
I recommend out and back trails for beginners, photographers seeking specific shots, or when hiking to iconic destinations like waterfalls or summit viewpoints. They're also ideal when you're testing new gear, hiking with children, or want the security of familiar terrain on the return journey.
Loop trails work better for experienced hikers who want variety, those seeking longer adventures without repetitive scenery, and hikers who enjoy the mental challenge of continuous navigation. Loops also provide better training for backpacking trips where you won't be retracing your steps.
From a practical perspective, out and back trails offer more flexibility in distance management. If you planned an 8-mile roundtrip but feel tired at the 3-mile mark, you can turn around for a 6-mile hike. With loops, you're generally committed to the full distance unless there are bailout trails.
The choice often depends on your hiking philosophy. Some hikers, like myself, appreciate the meditative quality of out and back trails - the rhythm of familiar terrain allows you to focus more on the natural environment, wildlife spotting, and personal reflection. Others crave the constant stimulation of new views that loop trails provide. Many trail enthusiasts eventually incorporate both types into their hiking repertoire.
Essential Gear and Equipment

Proper gear selection can make the difference between a memorable adventure and a miserable experience on your out and back trail hike. Through trial and error (and a few uncomfortable situations), I've learned which items are truly essential versus nice-to-have luxuries.
The Foundation: Footwear and Pack
Your feet will carry you every step of the way, so investing in proper footwear is non-negotiable. I recommend starting with day hiking shoes rather than heavy boots for most out and back trails under 10 miles. Trail runners work well for maintained paths, while hiking boots provide better ankle support on rocky or uneven terrain.
Recommended Hiking Footwear
For out and back trails, I've tested numerous options and found these to be reliable choices that balance comfort, durability, and performance. The right footwear depends on your trail conditions and personal preferences.
Budget-Friendly Option:
NORTIV 8 Men's Waterproof Hiking Shoes - $39.99Premium Choice:
For serious hikers wanting top-tier performance, consider premium hiking footwear that provides superior comfort and durability.
Hydration and Nutrition Systems
Proper hydration is crucial, especially on out and back trails where you can't refill water sources. I prefer hydration packs over water bottles for longer hikes because they allow hands-free drinking and better weight distribution.
Best Value Hydration Pack
Perfect for beginners and day hikers who want reliable hydration without breaking the bank.
National Park Foundation 18L Pack - $35.99Amazon's Choice • 4.5⭐ • 2L hydration bladder included
Premium Hydration System
For serious hikers who demand top performance and durability on challenging trails.
N NEVO RHINO 18L Pack - $39.894.7⭐ • 3L bladder • Insulated design
The Ten Essentials for Out and Back Trails
Even on day hikes, carrying the ten essentials can prevent minor problems from becoming major emergencies. I've learned to pack these items regardless of trail length or expected conditions:
- Navigation: Map, compass, GPS device or smartphone with offline maps
- Headlamp: Plus extra batteries - essential if you're out longer than planned
- Sun protection: Sunglasses, sunscreen, hat
- First aid: Basic supplies for common trail injuries
- Knife: Multi-tool for emergency repairs and food prep
- Fire: Waterproof matches or lighter
- Emergency shelter: Space blanket or bivy
- Extra food: More than needed for your planned hike duration
- Extra water: And purification method for longer hikes
- Extra clothes: Insulation and rain protection
Many hikers overlook the importance of quality gear until they experience equipment failure on the trail. I learned this lesson during a hike in the Rockies when my cheap backpack's zipper failed, leaving me to carry gear in my hands for the final 3 miles. Investing in reliable equipment from brands you trust, including proper work boots for rugged terrain, saves money and frustration in the long run.
My Personal Trail Experiences
:max_bytes(150000):strip_icc()/havasu-falls-arizona-WATERFALLHIKE0421-b6d6ee4e25214578a5b8236ba3bab2d7.jpg)
Over the past seven years of hiking, I've completed dozens of out and back trail adventures across the United States. Each experience taught me valuable lessons about preparation, pacing, and appreciating the unique rewards these trails offer.
My First Out and Back Adventure: Learning the Basics
My introduction to out and back trails happened on a 4-mile roundtrip hike to Hanging Lake in Colorado. What I thought would be a simple walk turned into a challenging lesson in elevation gain, hydration needs, and proper footwear. The 1,200-foot elevation gain over just 2 miles taught me that distance alone doesn't determine difficulty.
The ranger at the visitor center had warned me about the trail's steepness, but I underestimated the impact. By the halfway point, I was already feeling fatigued and questioning whether I had enough water. The familiar landmarks on the return journey, however, provided reassurance and helped me gauge my progress - a key benefit unique to out and back trails.
Seasonal Considerations: A Winter Learning Experience
One of my most memorable experiences occurred during a winter hike to Emerald Lake in Rocky Mountain National Park. The 3.6-mile out and back trail looked manageable on paper, but snow conditions transformed it into a completely different challenge. I learned the importance of checking current trail conditions, not just consulting summer hiking guides.
The ranger's advice proved invaluable: they recommended microspikes for traction and warned about the increased difficulty of route-finding in snow. More importantly, they emphasized that turnaround times become critical in winter conditions. The familiar return path became a lifeline when afternoon clouds rolled in and visibility dropped.
Photography Opportunities: The Return Journey Advantage
During a sunrise hike to Artist Point in Washington State, I discovered one of out and back trails' greatest advantages for photographers. The 4-mile roundtrip offered completely different lighting conditions on the return journey. The golden hour light that I missed on the early morning ascent was perfect for capturing the landscape during my descent.
This experience taught me to plan out and back hikes around optimal lighting conditions. Unlike loop trails where you're constantly moving to new vantage points, out and back routes let you revisit the same scenic spots under different conditions. I now carry extra battery packs and memory cards specifically for these extended photography sessions.
Lessons from Trail Rangers
During my hike to Vernal Falls in Yosemite, a ranger shared invaluable advice about out and back trail safety: "The return journey is when most accidents happen. Hikers are tired, it's often later in the day, and people rush to get back before dark. Take your time, stay hydrated, and remember that the trail looks different going downhill."
This advice has guided my hiking philosophy ever since. I now budget extra time for the return journey and carry a headlamp regardless of my planned return time. It's better to hike out in comfort than rush and risk injury.
Perhaps my most challenging out and back experience was the 16-mile roundtrip hike to the bottom of the Grand Canyon via the Bright Angel Trail. This epic adventure reinforced every lesson I'd learned about preparation, gear selection, and respecting the trail. The ranger-recommended sturdy hiking boots proved essential on the loose, rocky descent.
What struck me most about this experience was how the changing canyon walls told a geological story during both the descent and ascent. Each rock layer represented millions of years of history, and the out and back format allowed me to study and appreciate these formations from multiple perspectives. This deeper connection with the landscape exemplifies why I continue choosing out and back trails for meaningful outdoor experiences.
Safety Tips and Best Practices
While out and back trails are generally considered safer than other trail types due to their familiar return route, they still present unique safety challenges that require preparation and awareness. My years of hiking experience, combined with advice from park rangers, have taught me essential safety practices that every hiker should follow.
Pre-Hike Planning and Communication
Always inform someone about your hiking plans, including your chosen trail, expected departure and return times, and emergency contact information. I use a detailed trip plan that includes specific checkpoints and turnaround times. This information becomes crucial if search and rescue teams need to locate you.
Check current trail conditions, weather forecasts, and any park alerts before departing. Trail conditions can change rapidly due to weather, wildlife activity, or maintenance issues. I've avoided dangerous situations by checking trail reports the morning of my hike and adjusting plans accordingly.
Critical Safety Reminders
- Start early to avoid afternoon thunderstorms and extreme heat
- Carry more water than you think you'll need - dehydration is the most common hiking emergency
- Turn around if weather conditions deteriorate or you feel unwell
- Stay on marked trails to avoid getting lost and damaging fragile ecosystems
- Be extra cautious on the descent - most hiking injuries occur on the way down
Navigation and Route Finding
Despite following the same path both ways, navigation challenges can arise on out and back trails. Poor visibility, trail junctions, and changing conditions can disorient even experienced hikers. I always carry a physical map and compass as backup to GPS devices, which can fail or run out of battery.
Pay attention to landmarks on your outbound journey - unique rock formations, stream crossings, or distinctive trees that will help confirm you're on the correct path during your return. I take photos of key junctions and landmarks to reference later, especially in areas where the trail isn't clearly marked.
Wildlife Encounters and Environmental Hazards
Out and back trails can concentrate wildlife activity, especially near water sources or popular destinations. Research the wildlife in your hiking area and understand appropriate response procedures for encounters. I carry bear spray in bear country and make noise to avoid surprising animals on the trail.
Be aware of environmental hazards specific to your region - flash flood potential in desert washes, rockfall in mountainous areas, or poisonous plants in forested regions. The familiar return route of out and back trails can create a false sense of security, but conditions can change rapidly during your hike.
Emergency Preparedness
Carry emergency signaling devices like a whistle or personal locator beacon on remote trails. Know how to use your equipment before you need it. I practice using my GPS device and emergency gear regularly to ensure I can operate them under stress.
Consider investing in quality emergency gear and training. Having reliable equipment like proper footwear with good traction can prevent many common hiking injuries.
Group safety dynamics differ on out and back trails compared to loop hikes. Establish communication protocols and meeting points in case group members become separated. Designate an experienced hiker as the sweep to ensure no one falls behind, especially on the return journey when fatigue levels are highest.
Remember that cell phone coverage is often limited or nonexistent on hiking trails. Don't rely solely on your phone for emergency communication or navigation. Download offline maps before your hike and consider carrying a satellite communicator for remote areas. The key to safe out and back trail hiking is preparation, awareness, and conservative decision-making when conditions become challenging.
Frequently Asked Questions
Conclusion
Mastering out and back trails opens the door to countless outdoor adventures and provides the foundation for a lifetime of hiking enjoyment. These straightforward yet rewarding routes offer the perfect introduction to hiking while continuing to provide value even for experienced outdoor enthusiasts.
Throughout this comprehensive guide, we've explored the fundamental concepts that define out and back trails, from understanding distance calculations to selecting appropriate gear. The key takeaways center on preparation, safety, and respecting both the trail and your personal limits. Whether you're planning a short 2-mile family hike or an ambitious 16-mile adventure, the principles remain consistent.
Remember that every expert hiker started with their first trail. My personal journey from that challenging first hike to Hanging Lake to confidently tackling Grand Canyon adventures demonstrates that skills develop through experience and learning from each outing. The familiar return path of out and back trails provides the security needed to build confidence while still offering genuine outdoor challenges and rewards.
Your Next Steps
Start with a local out and back trail that matches your current fitness level. Focus on proper preparation rather than ambitious distance goals. Each successful hike builds experience and confidence for more challenging adventures.
Don't forget to invest in quality gear that will serve you well across many trails. Consider reliable options like comfortable hiking shoes and proper hydration systems to ensure safe and enjoyable experiences.
The outdoor community thrives on shared knowledge and mutual support. Connect with local hiking groups, consult with park rangers, and don't hesitate to ask questions. Most experienced hikers are eager to share advice and help newcomers discover the joy of trail exploration.
As you develop your hiking skills and explore different out and back trails, you'll discover that each route offers unique lessons and rewards. The waterfalls, viewpoints, and wilderness destinations that await at the end of these trails represent just the beginning of what the hiking world has to offer.
Most importantly, practice Leave No Trace principles to preserve these incredible outdoor spaces for future generations. The trails that provide us with adventure, exercise, and natural beauty depend on responsible hiking practices and environmental stewardship from every visitor.
Ready to Start Your Out and Back Trail Adventure?
Explore our complete collection of hiking gear, trail guides, and outdoor equipment to make your first trail experience safe and memorable.
Visit Explore National Parks Store