The Ultimate Skyline Trail Guide: Expert Tips for Hiking Mount Rainier's Most Spectacular Loop
The Skyline Trail stands as Mount Rainier's crown jewel, offering hikers an unforgettable journey through subalpine meadows, glacier viewpoints, and wildflower displays that rival any trail in the Pacific Northwest. After completing this spectacular loop over a dozen times across different seasons, I can confidently say this trail delivers everything a hiker dreams of—and more. Discover more incredible national park adventures that will transform your outdoor experiences.
Why the Skyline Trail is Mount Rainier's Crown Jewel

The Skyline Trail represents everything that makes Pacific Northwest hiking extraordinary. Starting from Paradise at 5,400 feet, this remarkable loop ascends through diverse ecosystems, offering hikers an incredible variety of experiences within a single day. What sets the Skyline Trail apart from other popular hikes isn't just its stunning views of Mount Rainier—though those alone are worth the journey—but the incredible diversity of terrain and wildlife encounters you'll experience along the way.
During peak wildflower season, the meadows explode with color as lupines, paintbrush, and mountain heather create natural tapestries that photographers travel thousands of miles to capture. The trail provides intimate encounters with Mount Rainier's glacial features, particularly the Nisqually Glacier, which you can observe up close while learning about the mountain's geological history. Wildlife sightings are common, with hoary marmots, mountain goats, and various bird species frequently spotted along the route.
The strategic positioning of the Skyline Trail offers panoramic views that extend far beyond Mount Rainier itself. On clear days, hikers can see Mount Adams, Mount St. Helens, and even Mount Hood in Oregon—a view that encompasses four major Cascade peaks in one sweeping panorama from Panorama Point. This vantage point provides one of the most comprehensive views of the Cascade Range available to day hikers, making it a must-do experience for anyone serious about exploring Washington's incredible trail systems.
The accessibility of the Skyline Trail from Paradise makes it an excellent introduction to Mount Rainier's alpine environment without requiring overnight permits or advanced mountaineering skills. Rangers consistently recommend this trail to visitors seeking the quintessential Mount Rainier experience, and after completing it numerous times, I understand why—it delivers an incredible return on investment for the time and effort required.
My First Experience on the Skyline Trail
My first encounter with the Skyline Trail happened during a foggy July morning that initially seemed unpromising. I had driven up from Seattle before dawn, arriving at Paradise to find the parking lot already half full by 7:30 AM—a lesson I quickly learned about the trail's popularity. The Jackson Visitor Center was still closed, but rangers had posted current trail conditions on the bulletin board, indicating snow patches remained at higher elevations despite the summer date.
I decided to tackle the loop clockwise, following advice from a ranger I had spoken with the previous evening. The initial climb from Paradise is steep and unforgiving, gaining significant elevation quickly through dense forest. My legs protested the early morning workout, but as I emerged above treeline, the fog began to lift, revealing glimpses of the spectacular terrain ahead.
The moment that made this hike unforgettable came about an hour into the trek when I encountered my first patch of alpine wildflowers. Despite having seen countless photographs, nothing prepared me for the vibrant intensity of the colors—deep purple lupines mixed with bright red paintbrush and delicate white mountain heather creating a natural garden that seemed almost too perfect to be real. I found myself stopping every few steps to take photographs, quickly understanding why so many hikers were already on the trail despite the early hour.
The approach to Panorama Point proved challenging due to lingering snow patches, but the effort was rewarded with views that literally took my breath away. Mount Rainier dominated the skyline, its massive bulk appearing close enough to touch, while the surrounding peaks of Mount Adams and Mount St. Helens provided dramatic context for the mountain's impressive scale. I spent nearly an hour at Panorama Point, eating lunch and watching other hikers experience their own "wow" moments as they reached this incredible vantage point.
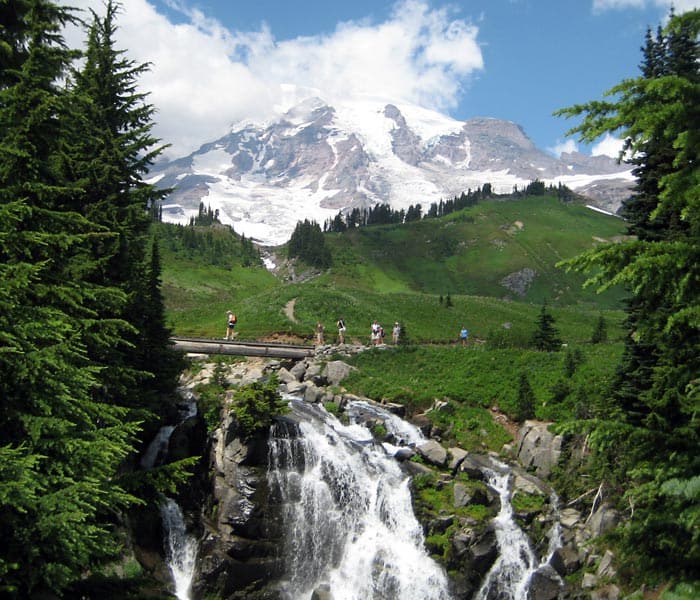
The descent through the Paradise Valley taught me why this area earned its name. The meadows were alive with marmot activity, and I witnessed several playful interactions between adults and juveniles that provided entertainment far better than any nature documentary. The final approach to Myrtle Falls offered a perfect ending to the hike, with the waterfall providing a cooling mist that felt incredibly refreshing after hours in the alpine sun.
Complete Trail Guide and Route Options
Trail Statistics and Overview
The Skyline Trail loop covers approximately 5.5 miles with an elevation gain of 1,700 feet, making it a moderately challenging hike suitable for most hikers with reasonable fitness levels. The trailhead begins behind the Jackson Visitor Center at Paradise, easily identified by the stone steps inscribed with John Muir's famous quote about the area. Most hikers complete the loop in 4-6 hours, though I recommend allowing extra time for photography and wildlife observation.
The trail can be hiked in either direction, and I've completed it both ways multiple times. Clockwise hiking offers early rewards with spectacular views but involves a steeper initial climb. Counter-clockwise provides a more gradual ascent but places Mount Rainier behind you for much of the descent. Based on my experience, clockwise offers better lighting for photography during morning starts, while counter-clockwise works better for afternoon hikes.
Key Waypoints and Highlights
Starting from Paradise, the first major waypoint is Myrtle Falls, reached after approximately 0.5 miles of hiking. This spectacular 78-foot waterfall provides an excellent warm-up photo opportunity and offers one of the most recognizable views in Mount Rainier National Park. I always recommend taking the short detour to the viewing platform—the extra few minutes are well worth the effort.
The trail then climbs through subalpine forest before reaching Glacier Vista at mile 1.5, offering close-up views of the Nisqually Glacier. This viewpoint serves as an unofficial turnaround point for many casual hikers, but continuing beyond this point rewards more adventurous hikers with increasingly spectacular scenery. The crowds typically thin out after Glacier Vista, providing more solitude for the remainder of the hike.
Panorama Point, reached at approximately mile 3, represents the trail's highlight and highest elevation point at 6,800 feet. The 360-degree views from this vantage point include Mount Rainier's summit, the Tatoosh Range, and distant volcanic peaks. I've visited this spot in various weather conditions, and even partially cloudy days often provide spectacular views as clouds move through the surrounding peaks.
Pro Tip: Consider quality hiking boots for better ankle support on the rocky sections near Panorama Point.
Route Variations and Shortcuts
Several route variations exist along the Skyline Trail, allowing hikers to customize their experience based on time constraints and energy levels. The Golden Gate Trail provides a shorter option, cutting approximately one mile from the total distance while still offering excellent views. However, taking this shortcut means missing the Stevens-Van Trump Memorial and the full Paradise Valley experience.
For hikers seeking additional challenges, the High Skyline Trail offers an alternate route past Panorama Point that climbs higher along the mountain's flanks. This variation adds both distance and elevation gain but provides even more spectacular views and solitude. I've taken this route several times and found it particularly rewarding during clear weather conditions when the extended views justify the additional effort.
Seasonal Variations and Best Times to Visit
Summer: Peak Wildflower Season
Summer represents the optimal time for hiking the Skyline Trail, with July through September offering the most reliable weather and trail conditions. Peak wildflower season typically occurs from late July through mid-August, when the meadows explode with color in ways that photos simply cannot capture. During my August visits, I've encountered wildflower displays so spectacular that other hikers were literally brought to tears by their beauty.
Summer hiking requires early starts due to afternoon thunderstorm potential and parking challenges. I recommend arriving at Paradise no later than 8:00 AM on weekends, though weekday visits offer more flexibility. Summer temperatures can vary dramatically, from cool morning starts requiring layers to intense midday sun exposure necessitating sun protection and plenty of water.
The summer season also provides the most reliable snow-free conditions, though patches can linger at higher elevations well into July during heavy snow years. Rangers post current trail conditions daily, and I always check these reports before heading out, as they provide valuable information about snow patches, wildlife activity, and any trail closures or restrictions.
Fall: Autumn Colors and Fewer Crowds
Fall hiking on the Skyline Trail offers unique rewards for those willing to accept shorter days and more variable weather conditions. September typically provides excellent hiking conditions with fewer crowds, while early October can offer spectacular autumn colors as the mountain's vegetation transitions into winter dormancy. I've experienced some of my most peaceful Skyline Trail hikes during September weekdays when I encountered fewer than twenty other hikers on the entire loop.
Fall weather patterns require more careful planning, as afternoon storms become more frequent and potentially severe. Morning starts become even more critical during fall months, both for weather avoidance and to maximize daylight hours. I recommend checking detailed weather forecasts and having backup plans for shortened hikes if conditions deteriorate.
Winter and Spring: Advanced Conditions
Winter and spring hiking on the Skyline Trail requires specialized equipment and experience with snow travel. From October through June, the trail typically requires snowshoes or microspikes, and route-finding skills become essential as trail markers are often buried. I've completed winter versions of this hike and found them incredibly rewarding, but they demand respect for mountain weather and proper preparation.
Spring conditions can be particularly challenging due to unstable snow and changing weather patterns. Late spring visits often encounter a mix of bare trail and deep snow patches, requiring flexibility in route selection and equipment choices. Rangers provide excellent advice for spring conditions, and I always recommend consulting with them before attempting shoulder season hikes.

Essential Gear and Safety Considerations
Footwear and Clothing Essentials
Proper footwear represents the most critical gear decision for the Skyline Trail. The rocky terrain, potential snow patches, and variable conditions demand sturdy hiking boots with good ankle support. After trying various footwear options over multiple hikes, I've settled on mid-height waterproof boots as the optimal choice for most conditions. Quality hiking footwear makes an enormous difference in comfort and safety on longer trails like this.
Recommended Hiking Boots
Columbia Men's Newton Ridge Plus II: Waterproof construction with excellent ankle support, perfect for variable Skyline Trail conditions.
Check Price on AmazonLayered clothing systems work best for the Skyline Trail's variable conditions. I recommend starting with moisture-wicking base layers, adding insulating mid-layers, and carrying waterproof outer shells regardless of the weather forecast. Mountain weather can change rapidly, and being prepared for temperature swings of 30+ degrees throughout the day prevents uncomfortable or dangerous situations.
Navigation and Safety Equipment
While the Skyline Trail is well-marked during summer conditions, carrying navigation tools remains essential, particularly for shoulder season hiking when snow can obscure trail markers. I always carry a GPS device or smartphone with offline maps, compass, and paper map as backup navigation tools. The terrain around Panorama Point can be confusing in poor visibility, making navigation skills valuable even on this popular trail.
Essential Trekking Poles
Cascade Mountain Tech Aluminum Poles: Lightweight, durable poles with extended grips—perfect for Skyline Trail's varied terrain and snow crossings.
Check Price on AmazonTrekking poles deserve special mention for the Skyline Trail, as they provide crucial stability on snow patches, loose rock, and steep sections. I consider them essential equipment rather than optional accessories, particularly for the descent from Panorama Point where loose volcanic rock can create slippery conditions. Quality poles also reduce stress on knees and ankles during the significant elevation changes encountered on this hike.
Hydration and Nutrition Planning
Proper hydration planning becomes critical on the Skyline Trail due to its length, elevation gain, and potential for warm weather exposure. I recommend carrying at least 2 liters of water per person during summer conditions, with additional capacity for longer photography stops or slower hiking paces. Multiple smaller water bottles work better than single large containers, as they provide backup if one becomes damaged and allow for better weight distribution.
Hydration Pack Recommendation
Water Buffalo Hydration Backpack: Lightweight 12L pack with 2L bladder, perfect for day hikes like the Skyline Trail loop.
Check Price on AmazonHigh-energy snacks and a substantial lunch make the difference between an enjoyable hike and an exhausting struggle. I prefer foods that provide sustained energy release rather than quick sugar hits—trail mix, energy bars, sandwiches, and fresh fruit work well. The views from Panorama Point deserve extended appreciation time, and having comfortable lunch options makes these stops more enjoyable.
Insider Tips and Local Knowledge
Parking and Timing Strategies
Successfully accessing the Skyline Trail starts with understanding Paradise's parking dynamics. The main parking lot fills completely by 9:00 AM on summer weekends, often earlier during peak wildflower season. I've learned to arrive by 7:30 AM for guaranteed parking, though this early start also provides better hiking conditions with cooler temperatures and fewer crowds on the trail.
The overflow parking area, located about a quarter-mile down the road, provides additional capacity but requires a longer walk to the trailhead. During my years hiking this trail, I've noticed that weekday visits offer significantly more parking flexibility, with spaces often available until 10:00 AM or later. Tuesday through Thursday typically provide the most relaxed parking situation.
Timing your hike for optimal lighting and weather conditions requires understanding Mount Rainier's daily weather patterns. Morning starts benefit from stable weather and excellent photography lighting, while afternoon starts risk thunderstorm development that can create dangerous conditions above treeline. I recommend starting no later than 10:00 AM for the safest and most enjoyable experience.
Photography and Wildlife Opportunities
The Skyline Trail offers exceptional photography opportunities that reward preparation and patience. Golden hour lighting occurs roughly one hour after sunrise and before sunset, creating spectacular conditions for mountain photography. However, midday light can also work well for wildflower photography when diffused by light cloud cover.
Wildlife photography opportunities abound along the Skyline Trail, particularly for marmots, which are active throughout the day and often allow close approaches. I've photographed marmots extensively along this trail and found them most active during morning and evening hours. Mountain goats occasionally appear on the rocky slopes above the trail, though they require telephoto lenses for quality images.
Local Ranger Advice: Check the Wilderness Information Center for current wildlife activity reports, including bear sightings and marmot activity areas.
User Review Insights
Sarah from AllTrails: "Completed the Skyline Trail in late July and the wildflowers were absolutely incredible. Started at 8 AM and had perfect weather. The climb to Panorama Point was challenging but so worth it. Saw mountain goats and lots of marmots. Definitely bringing my better hiking shoes next time though!"
Mike from Reddit: "Did this trail counter-clockwise and loved the gradual build-up to the views. The snow patches in early August were actually fun to cross with proper gear. Spent 2 hours just sitting at Panorama Point eating lunch and watching other hikers have their 'wow' moments."
Jennifer from TripAdvisor: "Third time hiking the Skyline Trail and it never gets old. This time I brought my 12-year-old daughter and we made it the whole way, though it took us 6 hours with all our photo stops. The marmots were very active and provided great entertainment during our breaks."
Pros and Cons Based on Experience
Advantages: The Skyline Trail offers unmatched diversity within a single hike, combining waterfalls, wildflower meadows, glacier views, and mountain vistas. The well-maintained trail system provides excellent infrastructure without feeling overly developed. Wildlife viewing opportunities are exceptional, and the variety of route options accommodates different fitness levels and time constraints.
Challenges: Crowds during peak season can diminish the wilderness experience, particularly at major viewpoints like Panorama Point. Weather dependency means that cloudy days significantly reduce the trail's impact, though even partially cloudy conditions often provide excellent hiking. The popularity can make parking challenging and requires early starts for optimal experiences.
Physical demands shouldn't be underestimated—the 1,700-foot elevation gain and 5.5-mile distance challenge many casual hikers. However, the well-graded trail and numerous rest opportunities make it achievable for most people with reasonable preparation and realistic expectations about timing and effort required.
Microspikes for Snow Conditions
Yaktrax Pro Traction Cleats: Essential for early season hiking when snow patches create slippery conditions on the Skyline Trail.
Check Price on Amazon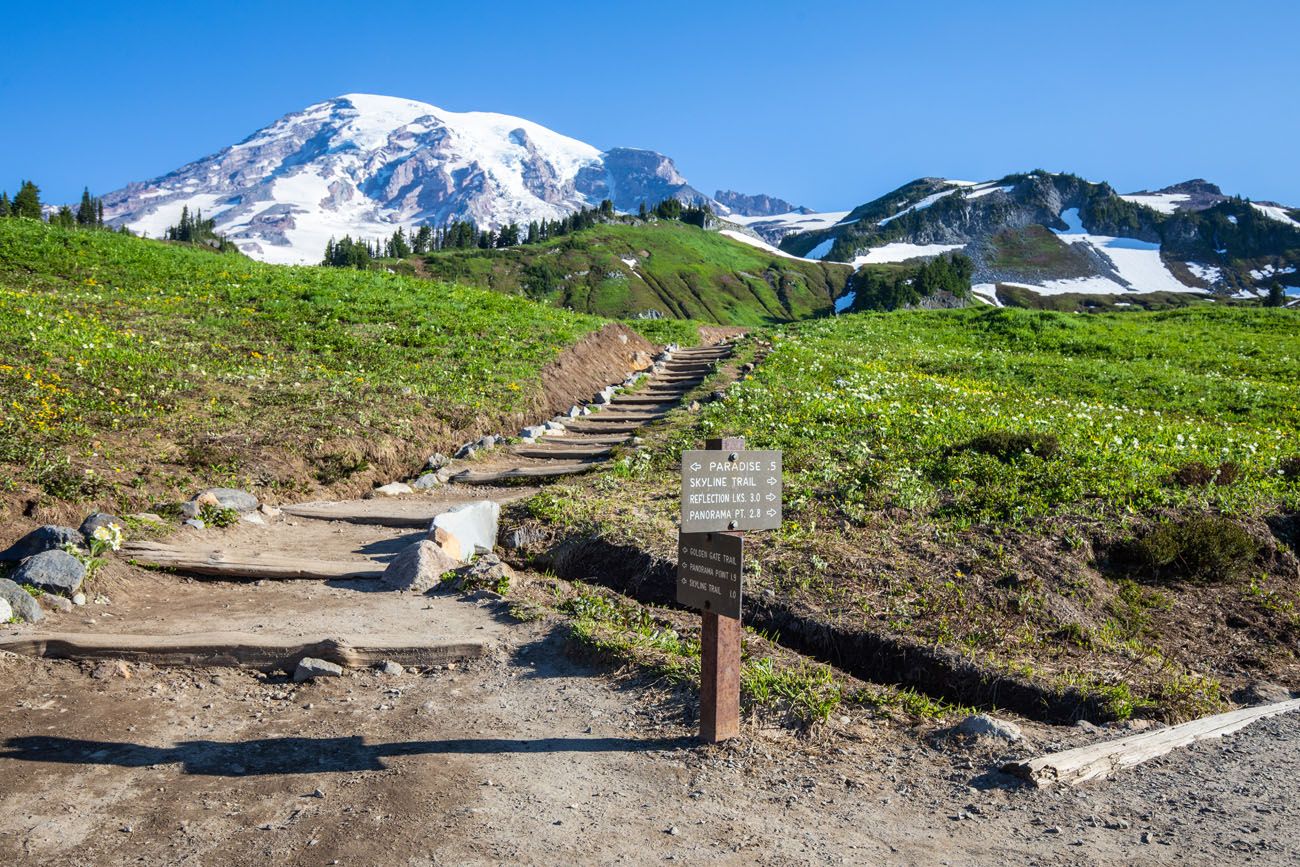
Conclusion
The Skyline Trail stands as Mount Rainier National Park's most rewarding day hike, offering an incredible diversity of experiences that justify its reputation as a must-do Pacific Northwest adventure. After completing this trail numerous times across different seasons, I can confidently say that it delivers on every promise—spectacular mountain views, incredible wildflower displays, wildlife encounters, and the satisfaction of completing a challenging but achievable hike.
Success on the Skyline Trail depends largely on proper preparation and realistic expectations. Early starts solve most parking and weather-related challenges, while proper gear ensures comfort and safety throughout the journey. The trail rewards careful planning with experiences that remain vivid long after the hike ends, from the first glimpse of Mount Rainier through the trees to the panoramic views from Panorama Point that encompass the entire Cascade Range.
Whether you're seeking your first major hiking challenge or adding another spectacular trail to your Pacific Northwest portfolio, the Skyline Trail offers something special for every outdoor enthusiast. The combination of accessibility and incredible scenery makes it an ideal introduction to Mount Rainier's alpine environment, while the various route options and seasonal variations provide reasons to return again and again.
Remember that the Skyline Trail represents just one of many incredible hiking opportunities available in Washington's national parks and forests. Challenging climbs and proper footwear choices continue to be essential elements of safe and enjoyable outdoor adventures, no matter which trail you choose to explore next.
Ready to Explore More Incredible Trails?
Discover detailed guides to America's most spectacular hiking destinations and gear recommendations from experienced adventurers.
Explore More AdventuresFrequently Asked Questions
How long does it take to hike the Skyline Trail?
The complete Skyline Trail loop typically takes 4-6 hours to complete, depending on your fitness level, weather conditions, and how much time you spend at viewpoints. I recommend planning for at least 5 hours to allow time for photography and rest breaks at key spots like Panorama Point and Myrtle Falls. Faster hikers can complete the loop in under 4 hours, while those taking their time with extensive photography and wildlife observation may need 6-7 hours.
What is the best time of year to hike the Skyline Trail?
The optimal time for hiking the Skyline Trail is from mid-July through early October. Peak wildflower season occurs in late July and August, offering spectacular displays of lupines, paintbrush, and mountain heather. I've hiked this trail in various seasons and found late August to be absolutely magical for both wildflowers and weather conditions. Early season (June-July) may have snow patches, while late season (September-October) offers fewer crowds and potential autumn colors.
Is the Skyline Trail suitable for beginners?
The Skyline Trail is rated as moderate to strenuous, making it challenging but achievable for beginners with reasonable fitness levels. The 1,700-foot elevation gain and 5.5-mile distance require preparation, but the well-maintained trail and incredible views make it worth the effort. I recommend starting with easier Paradise-area trails first if you're new to hiking. Consider shorter options like the Myrtle Falls trail or Glacier Vista for building confidence before attempting the full loop.
Do I need special permits for the Skyline Trail?
No special hiking permits are required for the Skyline Trail, but you do need a valid National Park entrance pass. During peak season (May 24 - September 2), timed entry reservations are required in addition to your park pass. I strongly recommend booking these reservations well in advance as they sell out quickly, especially for weekends. The timed entry system helps manage crowds and ensures parking availability for those with reservations.
What should I bring for winter hiking on the Skyline Trail?
Winter hiking on the Skyline Trail requires snowshoes or microspikes, trekking poles, extra layers, and navigation tools since trail markers are often buried. I've done this trail in winter conditions and recommend starting early when snow is firm, bringing extra food and water, and checking weather conditions carefully before attempting the hike. Winter conditions can be extremely challenging and are only recommended for experienced hikers with proper gear and avalanche awareness training.
Complete Hydration Solution
Lightweight Hydration Backpack with 2L Bladder: Perfect capacity and weight for the Skyline Trail's 5-6 hour adventure.
Check Price on Amazon